更新 @ 2019-12-13: 由 Go 1.13 開始,請使用內置的 Go Module 來管理套件。
這是關於在 Echo 框架中處理 HTTP 請求的第二篇文章,我們將繼續開發上一篇文章所完成的例子。
這次我們將建立一個簡單的 HTML 表格並將其實現為一個 POST 請求。
建立 POST 請求端點
取得此 git 項目 並新增 api/post_full_name.go 來處理 POST 請求。這個新文件幾乎與* api/post_full_name.go* 相同,唯一分別在於返回客戶端的 JSON 被格式化。
api/post_full_name.go
 1
 2
 3
 4
 5
 6
 7
 8
 9
10
11
12
13
14
15
16
17
18
19
20
21
22
23
24
25
26
27
28
29
30
31
32
33
34
35
36
37
38
39
40
41
42
43
44
45
package api
import (
"bytes"
"encoding/json"
"fmt"
"net/http"
"github.com/labstack/echo"
"gitlab.com/ykyuen/handling-http-request-in-go-echo-example-1/model"
)
func PostFullName (c echo.Context) error {
// Bind the input data to ExampleRequest
new (model.ExampleRequest)
if err := c.Bind (exampleRequest); err != nil {
return err
}
// Manipulate the input data
" " + exampleRequest.LastName
// Pretty print the json []byte
var resp bytes.Buffer
var b = []byte (
fmt.Sprintf (`{
"first_name": %q,
"last_name": %q,
"msg": "Hello %s"
}` , exampleRequest.FirstName, exampleRequest.LastName, greeting),
)
err := json.Indent (&resp, b, "" , " " )
if err != nil {
return err
}
// Return the json to the client
return c.JSONBlob (
http.StatusOK,
[]byte (
fmt.Sprintf ("%s" , resp.Bytes ()),
),
)
}
在 main.go 中添加新路由。
 1
 2
 3
 4
 5
 6
 7
 8
 9
10
11
12
13
14
15
16
17
18
19
20
21
22
23
24
25
...
func main () {
// Echo instance
New ()
// Instantiate a template registry with an array of template set
// Ref: https://gist.github.com/rand99/808e6e9702c00ce64803d94abff65678
make (map [string ]*template.Template)
templates["home.html" ] = template.Must (template.ParseFiles ("view/home.html" , "view/base.html" ))
templates["about.html" ] = template.Must (template.ParseFiles ("view/about.html" , "view/base.html" ))
e.Renderer = &TemplateRegistry{
templates: templates,
}
// Route => handler
GET ("/" , handler.HomeHandler)
e.GET ("/about" , handler.AboutHandler)
// Route => api
GET ("/api/get-full-name" , api.GetFullName)
e.POST ("/api/post-full-name" , api.PostFullName)
// Start the Echo server
Fatal (e.Start (":1323" ))
}
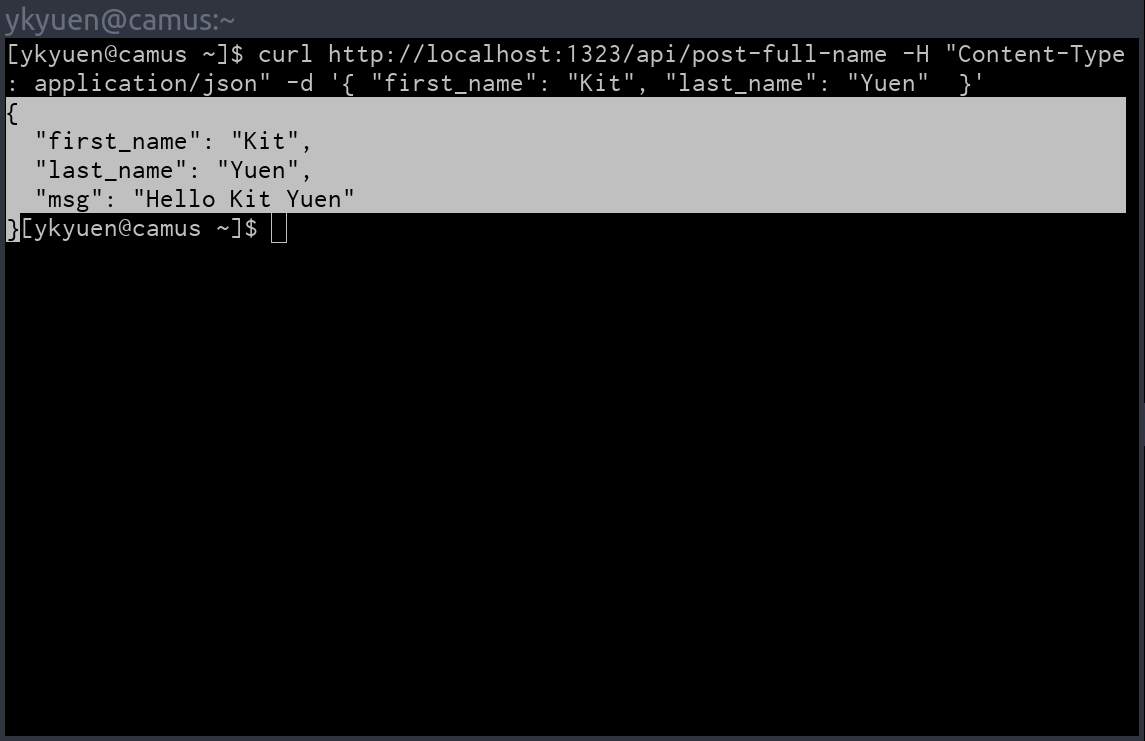
使用 curl 指令來測試新端點
運行 Echo 服務器並使用 curl 指令發送 POST 請求。
1
curl http://localhost:1323/api/post-full-name -H "Content-Type: application/json" -d '{ "first_name": "Kit", "last_name": "Yuen" }'
結果如下。
建立一張 HTML 表格
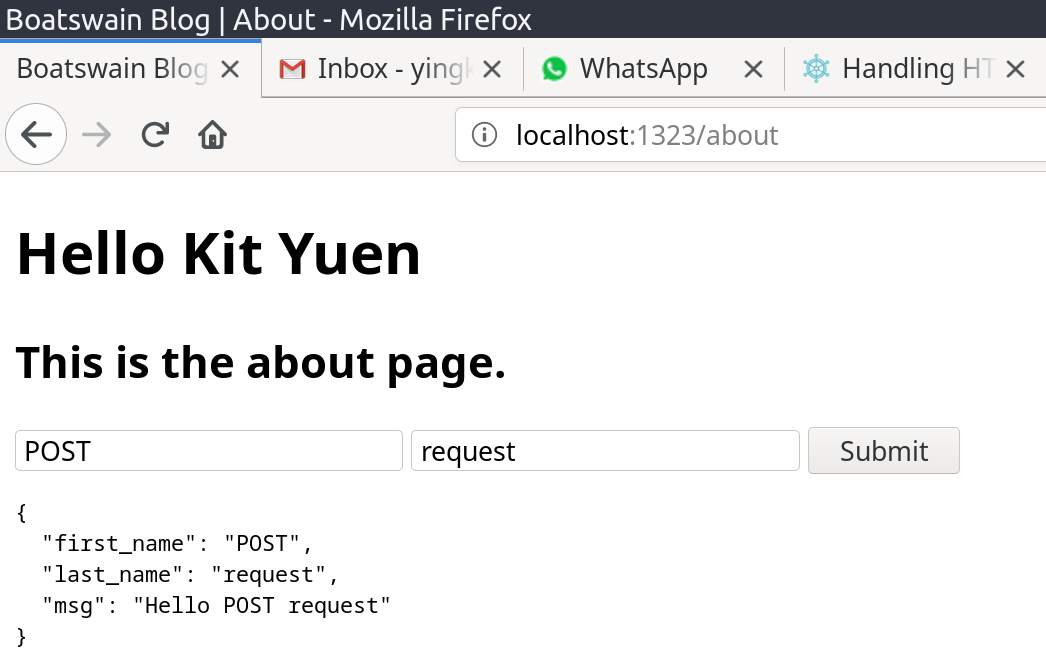
現在 POST 請求端點已準備就緒,我們可以在 about 頁面中添加一張表單並完成整個設置。
view/about.html
 1
 2
 3
 4
 5
 6
 7
 8
 9
10
11
12
13
14
15
16
17
18
19
20
21
22
23
24
25
26
27
28
29
30
31
32
33
34
35
36
37
38
39
40
41
42
43
44
45
46
{{define "title"}}
Boatswain Blog | {{index . "name"}}
{{end}}
{{define "body"}}
<h1 >{{index . "msg"}}</h1 >
<h2 >This is the about page.</h2 >
<!-- HTML form -->
<form id ="post-full-name-form" >
<input type ="text" id ="first-name" placeholder ="First Name" >
<input type ="text" id ="last-name" placeholder ="Last Name" >
<button type ="button" id ="submit-btn" >Submit</button >
</form >
<!-- Print the response after the jQuery ajax request -->
<pre id ="form-result" ></pre >
<script type ="text/javascript" >
// Send a ajax request when the submit button is clicked
"#submit-btn" ).on("click" , function (){
var firstName = $("#first-name" ).val();
var lastName = $("#last-name" ).val();
$.ajax({
type: "POST" ,
url: "/api/post-full-name" ,
data: JSON.stringify({
first_name: firstName,
last_name: lastName
}),
processData: false ,
contentType: "application/json" ,
dataType: "json"
}).done(
function (data){
$("#form-result" ).text(JSON.stringify(data, null , 2 ));
}
).fail(
function (data){
$("#form-result" ).text("POST request failed!" );
}
)
});
</script >
{{end}}
由於提交表格需要使用 jQuery ,所以要在修改 view/base.html 來加入它。
view/base.html
 1
 2
 3
 4
 5
 6
 7
 8
 9
10
11
12
13
14
15
16
{{define "base.html"}}
<!DOCTYPE html>
<html >
<head >
<title >{{template "title" .}}</title >
<!-- jQuery -->
<script
src ="https://code.jquery.com/jquery-3.3.1.min.js"
integrity ="sha256-FgpCb/KJQlLNfOu91ta32o/NMZxltwRo8QtmkMRdAu8="
crossorigin ="anonymous" ></script >
</head >
<body >
{{template "body" .}}
</body >
</html >
{{end}}
在 about 頁面中測試 HTML 表格
啟動 Echo 服務器並瀏覽 about 頁面,填寫名字和姓氏然後點擊提交按鈕之後就應該可以看到 API 回應的 JSON。
項目結構
這是新的項目結構,作了更改或新增的文件被加亮。(項目重命名為 handling-http-request-in-go-echo-example-2 ,如果要更改項目名稱,請確保正確設置 Golang 代碼中的 import 語句。)
 1
 2
 3
 4
 5
 6
 7
 8
 9
10
11
12
13
14
15
16
17
18
19
20
handling-http-request-in-go-echo-example-2/
  ├── api/                     # folder of api endpoints
  │   ├── get_full_name.go     # api for get full name
  │   ├── post_full_name.go    # api for post full name
  ├── handler/                 # folder of request handlers
  │   ├── home_handler.go      # handler for home page
  │   └── about_handler.go     # handler for about page
  ├── model/                   # folder of custom struct types
  │   ├── example_request.go   # struct type of get_full_name request
  │   └── example_response.go  # hstruct type of get_full_name response
  ├── vendor/                  # dependencies managed by dep
  │   ├── github.com/*
  │   └── golang.org/*
  ├── view/                    # folder of html templates
  │   ├── base.html            # base layout template
  │   ├── home.html            # home page template
  │   └── about.html           # about page template
  ├── Gopkg.lock               # dep config file
  ├── Gopkg.toml               # dep config file
  └── main.go                  # programme entrypoint
總結
本文是在 Go Echo 框架中操作 HTTP 請求 (1) 的後續,我們作了以下修改:
在 Echo 框架中建立 POST 請求端點。
格式化/美化 JSON 回應。
添加一個 HTML 表格並使用 jQuery/javascript 以 AJAX 將其實現一個 POST 請求。
完整的例子可以在此 gitlab.com 代碼庫 上找到。


